
The
Bark Canoe Store
Shop Address:
15 East Sinto
Spokane, WA 99202
Mailing Address:
1111 West 10th Avenue
Spokane, WA 99204
(509)327-7902
(office voice & fax)
(509)327-1850 (shop)
barkcanoe@earthlink.net
www.barkcanoe.com
John Lindman
proprietor/builder
Copyright (c) 2007
All Rights Reserved
IN THIS ISSUE
1. News -
Latest on Fiberglass Replica Canoes
- New Styles
- New Length
2. Tech Tip - More on Miniatures from Ted Behne,
News -
Latest on Fiberglass Replica Canoes
We now have 3 styles in 16 and 18ft and have handled the bulk of our production backlog. We can service orders quickly now and while shipping was presenting itself as a problem it appears that too is falling into place. Our lay-ups are strong, reasonably light and very authentic looking. Here are some shots of the resently built ones.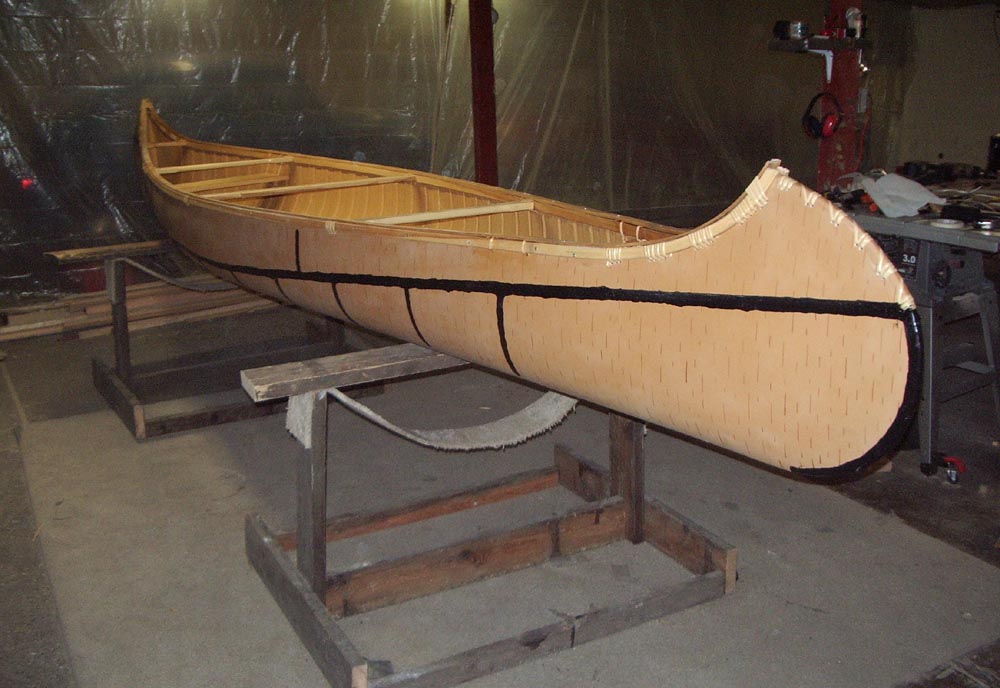
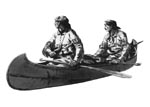
16ft Ojibwe Longnose
Ever done something like a project or trip that if you knew what you were about to get into in advance you would have never attempted it but once you started you were committed to take it to the end? Part way through you doubted if you should ever had started but you tough it out and once completed you're glad you did? Well these fiberglass replica canoes have been one of those trips. My god the speed bumps that were on this path...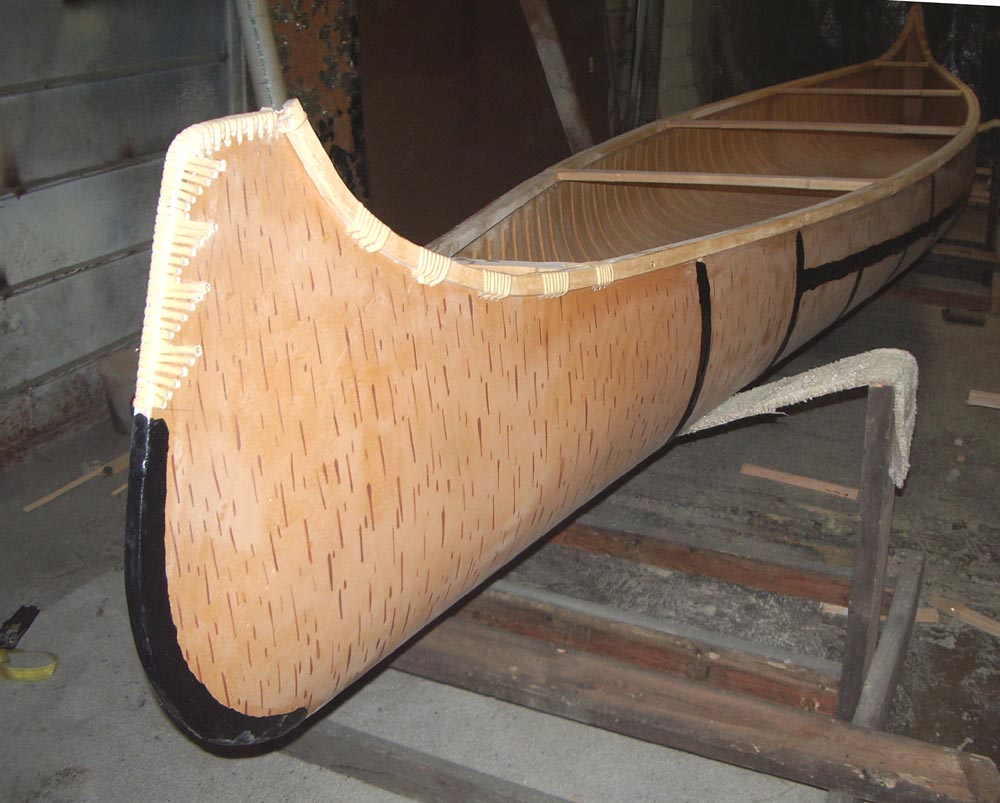
18ft Ottawa
I love birchbark canoes and building birchbark canoes because of the intimacy with nature, the Native way, etc. There are elements of these replica canoes that offer that same appeal but I can say that they do not include working with the Fiberglass. I like doing the design work, the trim work (pitching, lashing, wood work, etc.) but long ago - back in the early '80s when repairing whitewater kayaks - I swore I would never work with fiberglass or kevlar again. I think it's nasty stuff.
18ft Abenaki
When you do a project like this I have found that you have to emerse yourself in every element, learn it, hopefully get a good command of it and only then can you subcontract or pass some part over to someone else. It's the only way you can get the quality you want. So this winter I rolled up my sleeves and became a fiberglass dude.I now have reliable people doing the hulls and I have not been the most pleasant person to be around when it comes to beating the drum on quality. If I beat too hard they walk away (they too know it's messy stuff).
We will be constantly working on improving our quality. We want to keep these canoes affordable despite the man-hours involved with making them and when you count up the step, while they aren't as many as in building an authentic birchbark canoe, the average high grade canoe pales in comparison.
At this point the canoes are being hand laid up. Until recently this was the best way to make composites. There is, however, a new method called "infusion" which results in a virtually perfect lay-up every time - something that is difficult with hand laid products. We are looking at using this method. The result is no air bubbles, less resin used and a lighter product. On the environmental side of things there is very little toxic fumes. Virtually everything is done inside a vacuum so you don't have the messy, toxic aspect of standard fiberglass work. If we go this route we could be producing as fine a hull as any other on the market and there is nothing that I am aware of that is so thoroughly trimmed out and with as fine of materials as with our canoes. Our goal is not only the most authentic replicas but also the finest quality and most efficient paddling hulls. These will be canoes that will be easy paddling and portaging whether in the Boundary Waters/Quetico Wilderness, in Algonquin Provincial Park or on an historical trek down the Ohio.
You can view the whole line and all the details here.
Building Tip - More on Miniatures by Ted Behne
Pegging and Lashing the Gunwales
This article continues the assembly process by permanently setting the sheerline of the canoe with hardwood pegs and
lashings along the length of the gunwales.
Previous articles outlined other basic steps. These include: Selecting a
canoe to model; making a quarter-scale "blueprint"; constructing a reusable building platform; making a gunwale frame;
making and installing thwarts; making ribs; splitting cedar; splitting spruce roots for lashings; making sheathing to
line the interior of the hull; unrolling and raising the bark and setting the sheerline. To review previous articles,
go to www.barkcanoe.com/home.htm. Then select "Tips," then "Building Miniature Canoes." Required tools for pegging
and lashing the gunwales: about 50 standard-size clothespins; a hand drill with a 5/64" drill bit; one box of round
toothpicks; one pair of needle-nose pliers; one 1/8" diameter awl to punch holes in the bark; one razor knife.
After the sheerline has been established, with the sheering posts under each thwart and the gunwales held in position
by a series of clothespins, you are ready to begin locking the sheerline in place permanently. Double check to be sure
the bark is pulled up tightly and evenly on both sides and that all gores form smooth joints with no gaps.
Begin by drilling holes through the outwale/bark/inwale assembly, each hole centered between each marked lashing
interval. Then force tapered hardwood pegs into the holes. The holes should be made with a 5/64" drill bit. The
hardwood pegs can be easily made by breaking a round toothpick into two halves, each with tapered ends. Using a
pair of needle-nose pliers, force the tapered end of the toothpick into the pre-drilled hole until you feel strong
resistance. Slice off both ends of the peg flush with the gunwales. Repeat the process until all the spaces between
lashing intervals have been pegged. The sheerline of the canoe is now permanently set. The sheering posts can
now be removed from beneath the thwarts and the two halves of the building frame can now be removed. The rough,
canoe-shaped hull also can be removed from the building bed for more convenient access while lashing the gunwales.
Next comes the tedious, time-consuming but important process of lashing the gunwales. The lashings are both functional
and decorative. They hold the inwale-bark-outwale assembly together and they are also pleasing to the eye as they
march in regular intervals along the sheerline from stem to stem. Begin near the center thwart and work toward each
end, covering each marked lashing interval with spiraled loops of spruce root. A typical canoe model will have about
80+ lashings, with each lashing taking up to five minutes to complete. Do the math and you will find that the entire
process can take 7-8 hours.
There are as many different styles of lashings as there are canoe makers. One basic method follows. Begin by making
three holes in the bark under the outwale, one under each edge of the marked lashing interval and one centered between
the other two. Wedge a knife blade into the small gap between the outwale and the bark just large enough to force the
end of a root into the space, flat side facing away from the bark. Bend the root around the outwale, flat side down,
and put the sharpened opposite end of the root through the left hole in the bark. Pull lightly until the root is
tightly wrapped around both the inwale and outwale, flat side down. Then, maintaining tension with one hand, put
the end of the root through the same hole again, enlarging it if necessary with the awl. Wrap the root around the
inwale as before, but on the second turn only, position the second wrapping to the left of the first. Continue by
inserting the root tip into the second hole in the bark and positioning the root to the right of the first wrapping.
Continue until each hole has been filled at least twice and the marked lashing interval has been covered completely
with root lashings. End the lashing by running the tip of the root under the last right hand wrapping toward the
center of the lashing. Tighten the lashing and pull back toward the middle of the canoe to lock the root in place.
To fit the tip of the root under the last wrapping, you will need to delay tightening the last wrapping until the
root tip is fitted underneath. After the root tip has been positioned and pulled tight, carefully trim the root
end with a razor knife.
Continue the lashings until all marked intervals on the gunwales have been filled with root lashings.
Next, we will make the stem pieces and lash them in place. That process will be described in the next newsletter.
If you have questions about any of the above, just send an email to tedbehne@comcast.net.
To remove yourself from this list, simply reply to this email with the word "REMOVE" in the subject.
------------------------------------------------------------------------------------------